Dreaming of extending your living space outdoors? You might think you need expert skills to transform your backyard with a stunning wooden deck, but that’s not necessarily the case.
Whether it’s for morning coffees or evening barbecues, a ground level wooden deck is a perfect addition that enhances both the function and beauty of your outdoor area—and you can build it yourself!
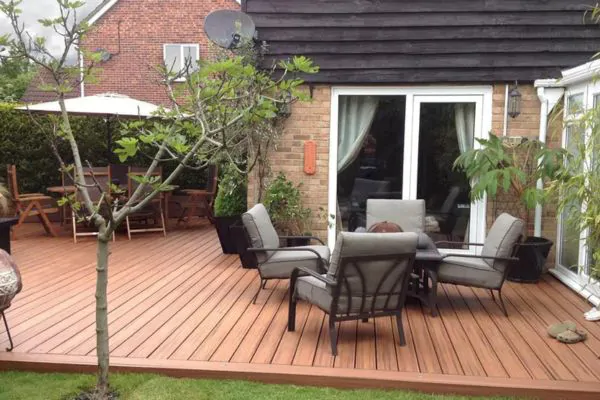
According to industry data, adding a wooden deck to your home can offer an impressive return on investment, sometimes as high as 75 percent! This fact alone turns this enjoyable DIY project into a smart financial move, too.
Our step-by-step guide will walk you through planning, preparing the ground, building the frame, laying down decking boards, and more—giving you all the essentials needed for creating an inviting outdoor retreat right at ground level.
Ready to take on this rewarding project? Let’s dive in and begin crafting your own backyard sanctuary!
1. Planning Your Ground Level Deck
Before you begin to build your wooden ground level deck, sketch out a clear plan. Decide where you want it to be and think about what size would work best for that area. Measure the space carefully, and consider how much room you’ll need for furniture or walking around.
Consider the direction of sunlight throughout the day; do you want your deck to soak in the morning sunshine or bask in the glow of sunset?
Once you’ve got an idea of location and size, research local building codes to make sure your deck meets all requirements. This can include rules about how close your deck can be to property lines or what materials are approved for use.
Creating a detailed list of required tools and materials beforehand will save time later on during construction. You’re not only building a place to relax but ensuring every step is done with care and precision for long-lasting enjoyment.
Related Post: Building a Deck: Estimating the Construction Time
2. Gathering Tools and Materials
Start your deck-building adventure by making a checklist of all the tools and materials you’ll need. You won’t want to pause progress because you’re missing something essential, so ensure you have items like a circular saw, drill, screws, hammer, level, and tape measure ready.
Choose pressure-treated lumber or other suitable outdoor wood for your ground level deck framing and decking boards. Don’t forget safety gear such as gloves and goggles.
3. Preparing the Ground
With tools and materials at the ready, you’ll now focus on creating a solid foundation for your deck. Clear the area where you plan to build, removing any grass, rocks, or debris that could interfere with a flat building surface.
Leveling is critical: use a shovel and rake to adjust the contours of the soil as needed. For optimal stability, consider laying down landscape fabric followed by a layer of gravel; this will help prevent weeds from growing up through your deck while ensuring proper drainage.
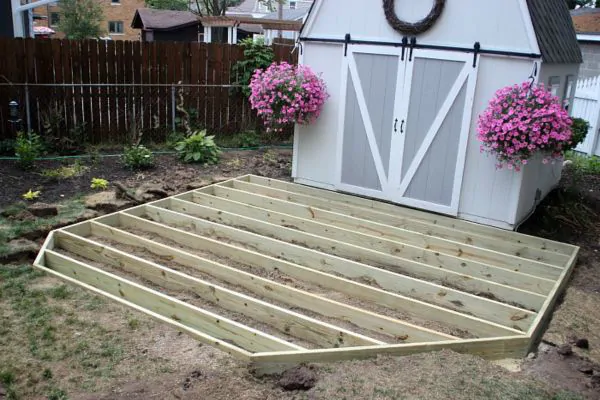
Compact the ground thoroughly using a hand tamper or plate compactor; this step cannot be overstated in its importance for preventing future shifting or settling of your wooden deck structure.
4. Building the Deck Frame
To build the deck frame, measure and mark the layout according to your deck plan. Then, dig post holes at each corner to support the frame. Place a concrete footing in each hole and insert 4×4 posts, making sure they’re level using a spirit level.
Next, attach beams parallel to the ledger board with joist hangers, spaced no more than 16 inches apart. Finally, add cross beams perpendicular to the beams using metal connectors before securing them with screws.
5. Installing Decking Boards
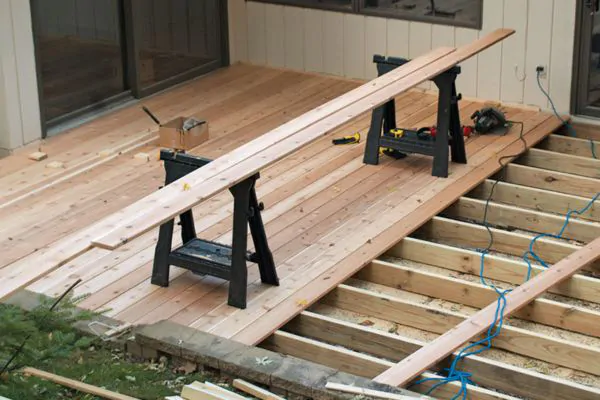
To install the decking boards, begin at one edge of the deck and place the first board with its groove facing towards the edge. Use deck screws to secure it in place, ensuring it is level and aligned with the frame.
Then, insert a spacer between this board and the next one to maintain an even gap. Continue this process for each subsequent board, securing them in place until you reach the other end of the deck.
6. Adding Finishing Touches
Once the deck frame is built and the decking boards are installed, you can add finishing touches such as railings or decorative elements to enhance the appearance and functionality of your ground level wooden deck.
Ensuring Structural Integrity and Safety
To ensure the structural integrity and safety of your ground-level wooden deck, carefully inspect all materials for any defects or damage. Double-check that all fasteners are properly secured and that there are no signs of warping or splitting.
Regularly inspect your ground level wooden deck for any signs of wear, decay, or pest infestation. Address any issues promptly to prevent further damage and maintain a safe and sturdy structure for years to come.
Maintaining Your Ground Level Wooden Deck
Regular maintenance is key to keeping your ground level wooden deck in top condition. This includes checking for rot or decay, sealing and staining, and ensuring proper drainage to prevent water damage.
Tips and Tricks for a Successful Build
Select the right type as it needs to withstand outdoor elements. Build a strong foundation by using concrete footing, if required. Check for any building code or permit needed in your area before starting construction.
Plan and measure properly to avoid mistakes during installation. Regularly maintain your deck with cleaning, sealing, and inspecting for wear and tear. Use stainless steel or coated screws to prevent corrosion and ensure the longevity of your deck. You can also contact a local deck contractor in your area to build one for you.
You might like: How to Hire a Professional Decking Contractor
FAQs on Building a Ground Level Wooden Deck
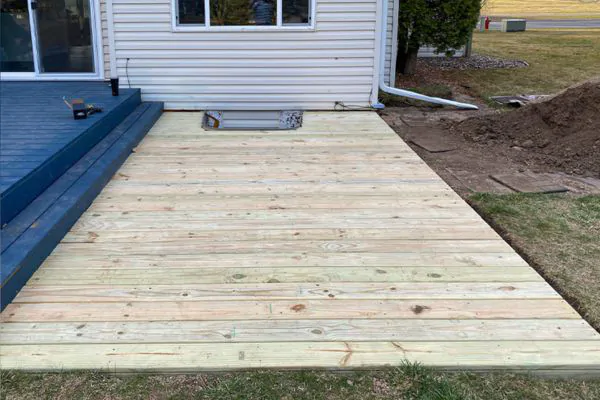
Learn about the important considerations when building a ground level wooden deck, including permit requirements, types of wood to use, dealing with uneven ground, pest and decay protection, the necessity of railings, and the typical lifespan of your new deck.
Do I need a permit to build a ground level wooden deck?
Typically, if the deck is less than 30 inches above grade and does not serve as an exit from the house, you may not need a permit. However, confirming this with your local authorities before starting any work is crucial.
Ensuring that you have the necessary permits in place helps avoid potential legal issues and ensures that your deck meets safety standards. It also provides peace of mind knowing that your project complies with local regulations.
What are the best types of wood for a ground-level deck?
Pressure-treated lumber, such as southern yellow pine or Douglas fir, is popular due to its affordability and resistance to decay and insects.
Cedar is another excellent choice, known for its natural rot resistance and attractive appearance.
Redwood is also a top option for ground-level decks, valued for its beauty and strength. It naturally resists decay and insect damage due to high tannin levels. Tropical hardwoods like ipe or mahogany are pricier but offer unparalleled durability and beauty, making them suitable choices for a long-lasting ground-level deck.
Can I build a ground level deck on uneven ground?
Before tackling the challenge of building a ground-level deck on uneven ground, it’s essential to assess the topography thoroughly. Begin by leveling the area where you plan to construct the deck. This can be achieved using gravel or concrete blocks to create a stable base for your decking materials.
Once the ground is level, proceed with constructing a sturdy frame that accommodates any variations in elevation. Ensure each support beam is precisely positioned and anchored securely into the ground.
How can I protect my ground-level deck from pests and decay?
To protect your ground-level deck from pests and decay, consider using pressure-treated lumber for the structural components. This wood is infused with preservatives to resist rot, decay, and insect damage.
Applying a sealant to the cut ends of the boards during installation can minimize moisture absorption and deter insects. Furthermore, ensuring proper ventilation underneath the deck through adequate spacing between decking boards can reduce moisture build-up, preventing decay.
Are railings necessary for a ground-level deck?
Railings are not always necessary for a ground-level deck, but they can be beneficial for safety and aesthetics. They provide support and security, especially in areas with uneven ground or if the deck is higher off the ground.
Before making a decision about installing railings on your ground-level wooden deck, consider local building codes and regulations. Even if not required, you may choose to install railings as an extra precaution to prevent accidental falls or simply to add character to your outdoor living space.
What’s the typical lifespan of a ground-level wooden deck?
A ground-level wooden deck typically has a lifespan of around 10 to 15 years, depending on the type of wood used and how well it’s maintained. Pressure-treated wood, cedar, and redwood are popular choices for their durability.
Regular maintenance, including sealing or staining every few years and addressing any signs of rot or decay promptly, can significantly extend the lifespan of your deck. Proper drainage and ventilation underneath the deck also play a crucial role in preventing moisture-related issues that can shorten its longevity.
Your Local Deck Building Company at Your Service
If you’re in Michigan and looking to enhance your outdoor living space, then look no further than Michigan Deck Builders. As a local deck building company, they understand the unique needs and preferences of Michigan residents when it comes to creating the perfect deck for their homes.
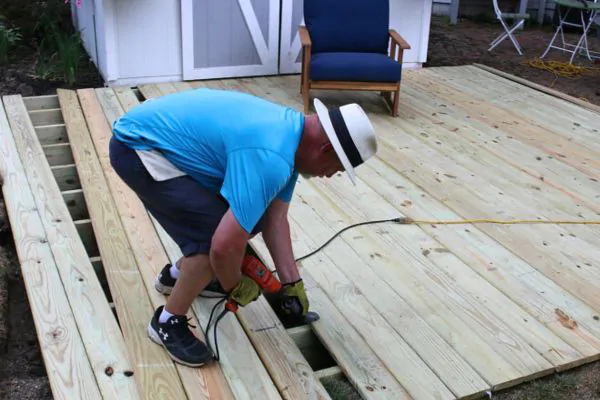
With years of experience and a team of skilled craftsmen, Michigan Deck Builders is committed to delivering top-notch deck building services that meet both your aesthetic and functional requirements. Whether you have a small backyard or a sprawling lawn, they have the expertise to design and construct a deck that seamlessly blends with your existing landscape.
